

At 11:30pm on Valentine’s Day, I realized I hadn’t sent along two little VDay gifts to Sam and Aaron – oops! But I was suddenly inspired, after spending the evening cooking and blogging about pink hearts made of ham to get creative and go make little fabric Valentine tags to attach to the gifts.
So I headed upstairs after everyone else, but they knew I wasn’t going to bed THAT early ;) I’m such a night owl. I picked out some pink and red fabric from my stash, grabbed a couple bottles of paint and a brush, and all of the “etc.” to go along with my vision and got to work. I ended up with 2 little heart-shaped tags I’m very tickled by!!

 |
| I *heart* getting Crafty! |
 |
| Supplies -- see list below. |
Here’s a little picture tutorial plus an instruction sheet at the end. If you have any questions, be sure to ask me in the comments! I’d love to help you create some of these yourself. You could make them Easter Egg shaped and put Faith, Hope, etc., on them, or use them for birthdays or Mother’s Day. Get creative!
By the way, cookie cutters make great shape templates!
 |
| Trace with disappearing marker onto lights and mediums |
 |
| Trace with chalk onto darks |
 |
| Use marker dots on batting This is Warm n' White |
 |
| Snip and tear a 1" strip oflightest fabric to use for banners |
 |
| Press torn strip onto freezer paper.This stabilizes it for painting and writing. |
 |
| Dip opposite corners of stiff flat-edge brush into light and dark paint, using less of the dark shade |
 |
| Blend paint into brush with plenty of water |
 |
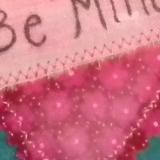
| Use long parallel strokes, barely touching the fabric with an almost dry brush to accent the fabric strip you will write sentiments onto. I have gone back and "kissed" (or dabbed) some color for an interesting look. |
 |
| Detail of fabric strip. (It's really not that dark of pink.) You can see my final layer of light pink just skiffing across the top. You never want to have the fabric be wet enough from the paint for it to absorb -- keep it sitting on top of the fibers and you'll keep that woven texture showing through. |
 |
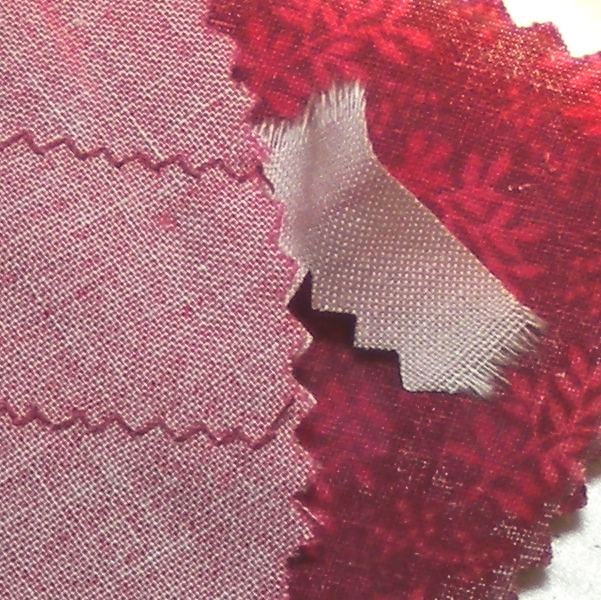
| Highlight the fabric hearts you have cut out with pinking shears. Above is an untouched heart and a highlighted one. Use very watered down paint and a wetter brush to "dye" the fabric. |
 |
| Red hearts highlighted. The left two are the backside of the fabric which I am using as the "right" side, the right-hand heart is the frontside, touched with the dark pink almost all over. |
 |
| My trials with the pens, in order. The first TWO are the Micron Brush tip that I really liked. |
 |
| The pens I tried. I ended up using Micron Brush in Sepia and Zig Writer (narrow end) in a rosy purplish color. |
 |
| Mark the freezer paper to show the space needed for one heart. (see the pink hash marks along the edge?) Place any embellishments your words need to fit with and then practice writing in that size of area. |
 |
| Cut banner strip larger than final size, peel it off the freezer paper, position and pin, then sew it down just inside the frayed edge |
 |
| Use pinking shears to trim edges of banner to match heart, or trim them however you want! The first two I did are trimmed at a slant, mostly longer than needed. |
 |
| Stack the front on top of the batting and backing fabric layers. Pin with pin-points going COUNTER-CLOCKWISE |
 |
| 1) Stitch around the edges -- I "scribbled" with a straight stitch 1/8"-1/4" in, (Directions below give details.) 2) Tape down buttons and hangers to hold in place so you can machine stitch them on. Choose a wide zigzag that matches your button's holes, the shortest stitch length, and carefully make sure you target the holes in the button!!! |
 |
| Click to ENLARGE :) So you can see paint, marker, and tape detail. Taping buttons down and zigzagging them on saves so much time and hassle!! "Magic tape" used for gift wrapping tears cleanly away when you are done. |
 |
Tape down the hanger and stitch it like the button. For elastic cord, knot it first, tape and stitch it down at the base of inner point -- don't stitch through the cord! Remove the tape, then slide the cord up until the knot reaches the stitches. |
 |
| The finished fabric heart tags! ~not the best picture, but it enlarges if you click it for detail. |
Written instructions can be found here!
Gail
No comments:
Post a Comment